How to Build a 20’ Shipping Container Office – Video
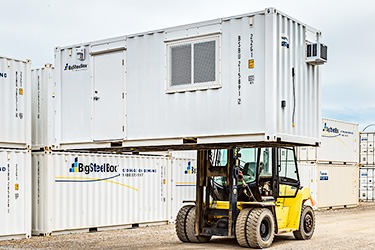
BigSteelBox has been modifying shipping containers for years, and one of our most popular products is our 20’ container office. We always have a number of 8’x20′ shipping container offices available for rent and for sale, so we’re able to service customers across Canada quickly and efficiently.
 Our offices are primarily used on construction and industrial worksites, but there are many other uses.
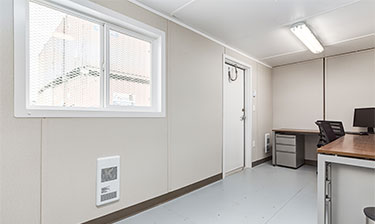
Our container offices are made from 8-gauge corten steel containers, so they’re strong, easy to move, and built to last. They’re well-insulated and come equipped with air conditioning, heat, electrical outlets and lighting, so wherever a comfortable, temporary workspace is required, a BigSteelBox office is a great solution.
You may wonder how we build our 20’ shipping container offices. So, we created the timelapse video above to give you a glimpse into the process, but read on for more details of how we build a 20-foot shipping container office.
1. Openings are cut in the shipping container.
We always start with a new, one-trip shipping container as the frame for your office. A zip disc tool is used to cut the openings for a door, window and air conditioner. We then install frames for the door and windows.
2. Spray foam insulation is applied to the walls and ceiling of the shipping container.
Our container offices have two layers of insulation. The first layer is a ½” skim coat of R-3 spray foam insulation, which is applied to all walls and the ceiling. This layer acts as a thermal break for the unit that reduces the risk of condensation caused by changes in temperature. The second layer of insulation is installed after the electrical rough-in (see #6 below).

3. Door and window are installed.
The next step is to install the man-door and window on the frames. Our offices come with a 3’0” x 6’8” steel man door with lock box, and a 4’0” x 3’0” horizontal slider window.
4. Interior of the container is framed.
Next, all walls and the ceiling are framed with 2” x 3” studs, 24” on-center.
5. Electrical wiring is roughed-in.
All electrical is installed by experienced, certified electricians. The electrical package in our 20’ container offices include 2,000 watt baseboard heaters, LED vapour-tight lights, a 100 amp panel with breakers, an LB fitting, light switch, plug-ins, and an exterior light.
6. Second layer of insulation and sheeting is installed.
The second layer of insulation is applied to all walls and the ceiling. This layer is R-12 pink batt insulation, which ensures a temperature-controlled environment. Then, vinyl wrapped drywall, battens, trim, and baseboards are installed.
7. Electrical and finishings are completed.
The air conditioner and electrical fixtures are installed and the container office is now ready for its final interior finishings to give it a professional appearance. The final pieces of trim are added, caulking and paint are applied where needed, and the floor is painted to the customer’s desired finish.
And there you have it! That’s how we build a 20’ shipping container office.
Your BigSteelBox container office will be much stronger and more durable than a wood-frame site trailer. Because shipping containers are built to withstand the heavy abuse of ocean travel and constant movement, and they have multiple lifting points along their rigid steel frame, a BigSteelBox office can be easily transported around your site or moved to a new one without risk of damage to its integrity.
If you’re looking to rent or buy a 20’ shipping container office, we’d love to help you! Contact us at 1-800-373-1187 or request your free quote online now.


